Thursday, January 30, 2014

How to Create a Retro Postcard Design in Gimp 2.8


An awesome tutorial on creating postcards with The GIMP. This one is from JosephsPlace at YouTube. When I first attempted this, I got lost in the middle of the tutorial and starting working on this postcard project on my own. Here is the result of my first attempt, a postcard from my hometown in Old Roseville, CA:

Postcard - Greetings From Roseville, California
First attempt.
The author of the tutorial mentions Photoshop users have access to an easy wave making tool. In GIMP, we have to use the path tool to create a text along path or use the newer cage transform tool, which is what I did.

This tutorial is also beneficial due to the extra techniques the author mentions that can really change the way you do graphics. Little things such as changing the font size of the first letter so that is is roughly 10-15% larger then the rest of the proceeding text. Also the links to the font used was a good look by the author, I have used them now in many projects.

Postcard - Visit Beautiful Locke, California
Second attempt.
I did find some flaws in my second go-around, while making the postcard for Locke, CA. During my first attempt, I painstakingly cleaned up the edges to remove the aliasing that occurs when you create the 3-D background. The second time around, I was able to follow the tutorial to the end and found that my edges showed bad aliasing which is hard to fix. You have to go around the entire edge with a small, maybe 1-pixel size eraser brush and remove the edges. Unless there is a better way that I am unaware of. Here is the result of my second go:

Some other useful techniques I found in my second go was the black radial gradient the author uses to bring out the text, along with the softlight radial gradient used to create a light source. Very cool. If you are interested, check out JosephsPlace tutorial on YouTube or the embedded video below:


Tuesday, January 28, 2014

GIMP Tutorial - Use Channel Mask & Threshold for Complex Selections by V...

GIMP Tutorial - Use Channel Mask & Threshold for Complex Selections by V...

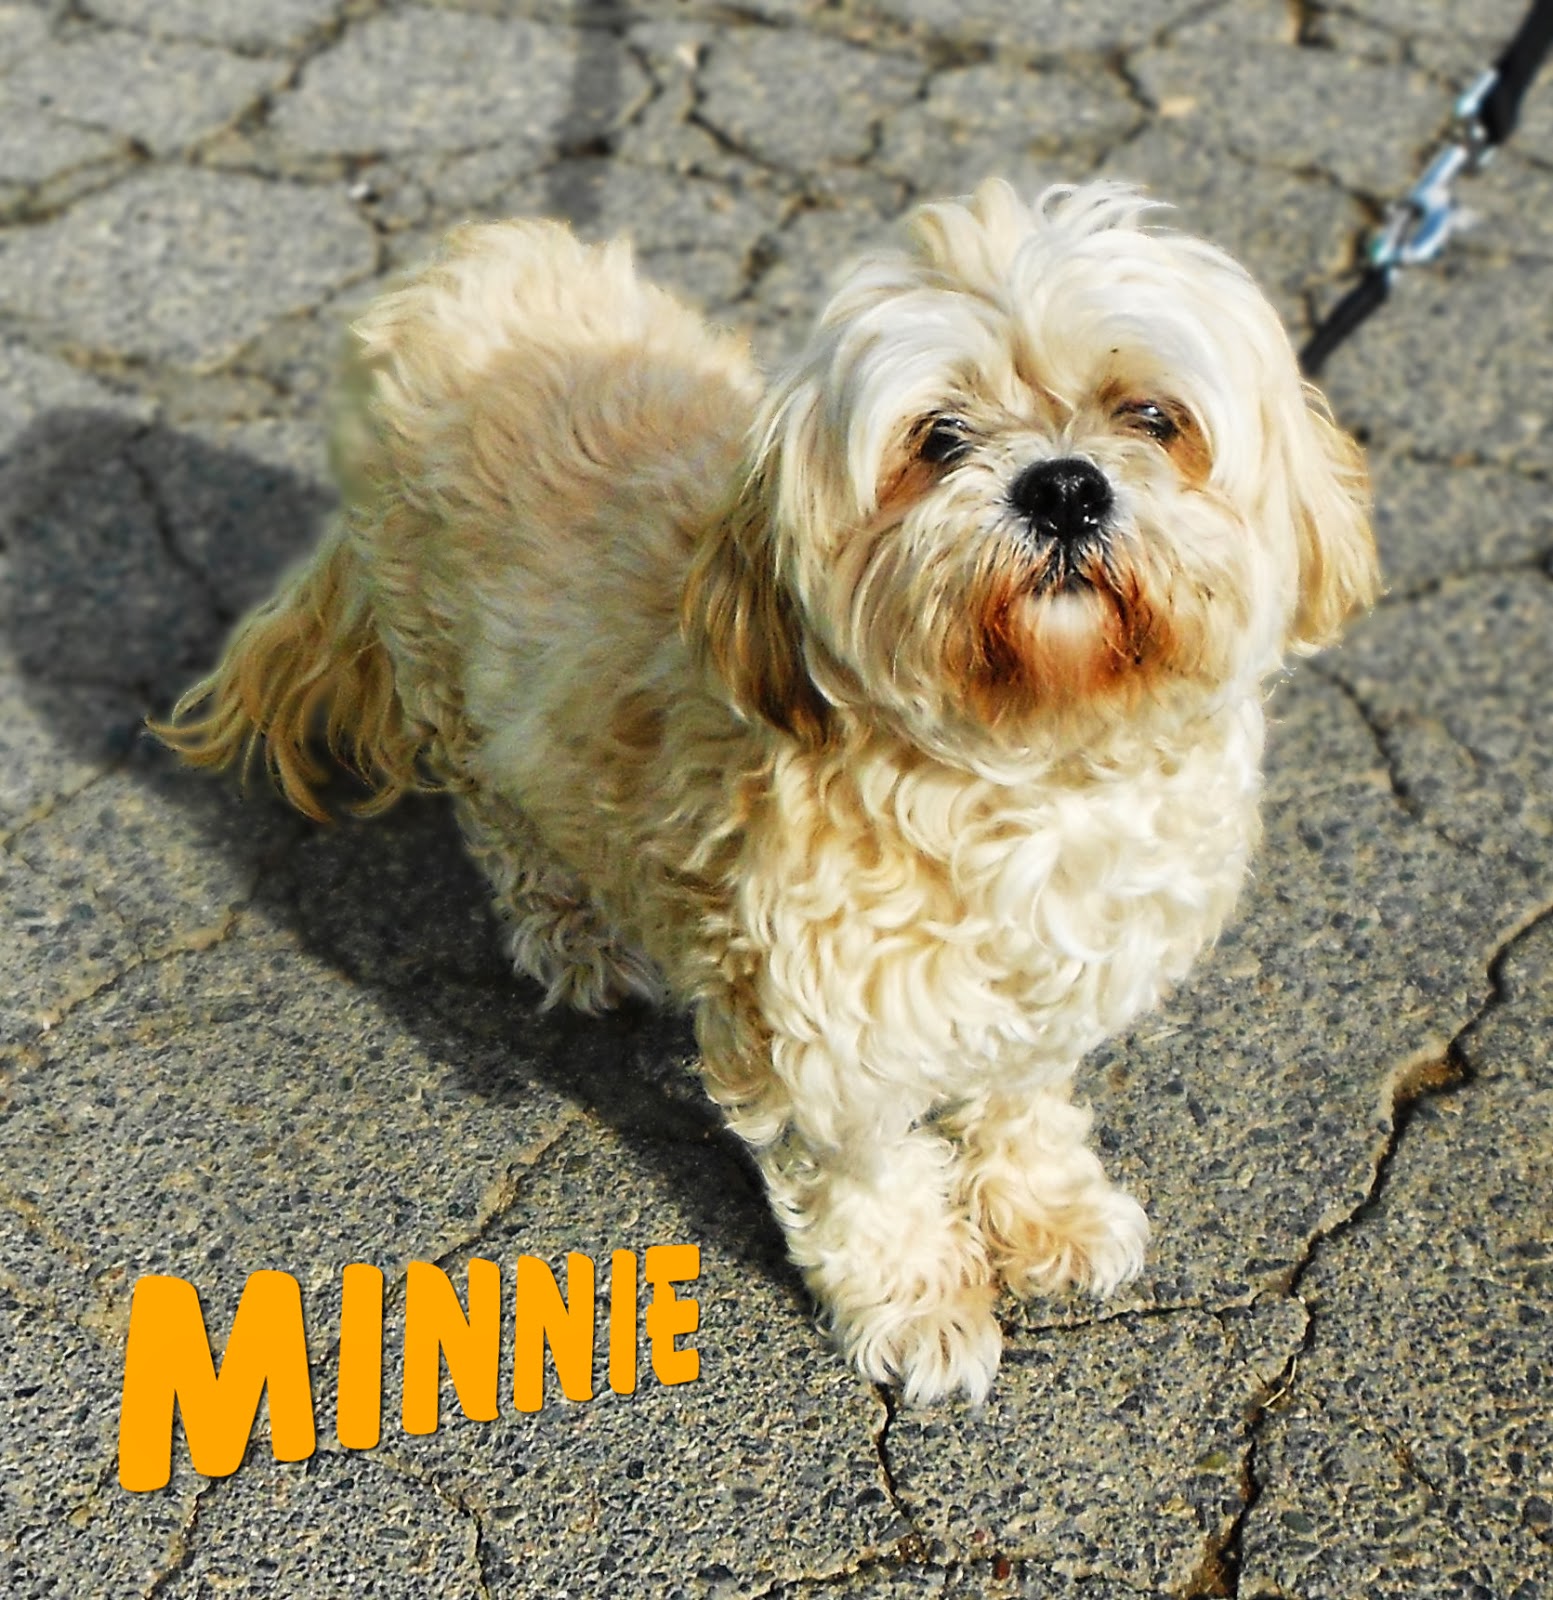
Furry Lhasa Apso/Mix
Minnie the furry Lhasa Apso/Mix with simulated depth-of-field.
I use a lot of GIMP tutorials found all over the web for various projects. One of my go-to instructors is VscorpianC, be sure to check out her YouTube channel. I do a lot of graphic work as a volunteer at the local animal shelter, and often times I want to use a photo of a dog that has a crummy background, such as the one of Minnie, the 9-year old Lhasa Apso/Mix available for adoption, in the picture to the right.


To work with the photo I need to lasso the animal in GIMP and then either replace the background with a nice looking graphic or use a technique I learned from another tutorial found online called simulating depth-of-field (DOF), thanks to the GIMP Guru. This technique is easy enough to perform on a picture of a smooth-haired chihuahua or pitty, but on a Lhasa Apso... yeah all that fur makes lassoing the outline of the dog a real pain!

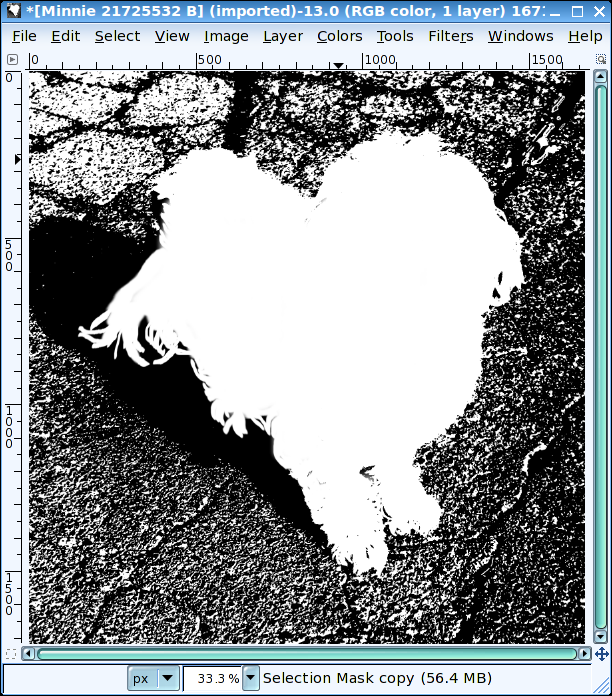
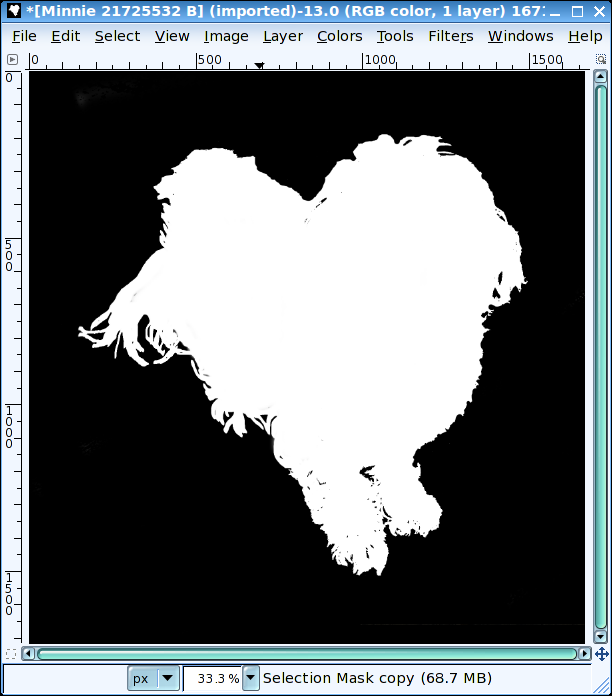
Channel selection mask copy.
Using the color threshold and paintbrush to create a channel mask.

Luckily, I found VscorpianC's tutorial on using a channel mask threshold for complex selections. Using an image of a tiger with whiskers poking out against the background, VscorpianC clearly informs how to use GIMP's channels and color threshold to create a channel mask.

Layer Mask.
Layer mask.
After creating the channel mask, VscorpianC explains that you can add a layer mask and use the channel selection mask copy as a selection. From there you can replace the background if that is all you want to do. Or, create a simulated DOF, such as I did. Check out GIMP Guru's tutorial on simulated DOF.

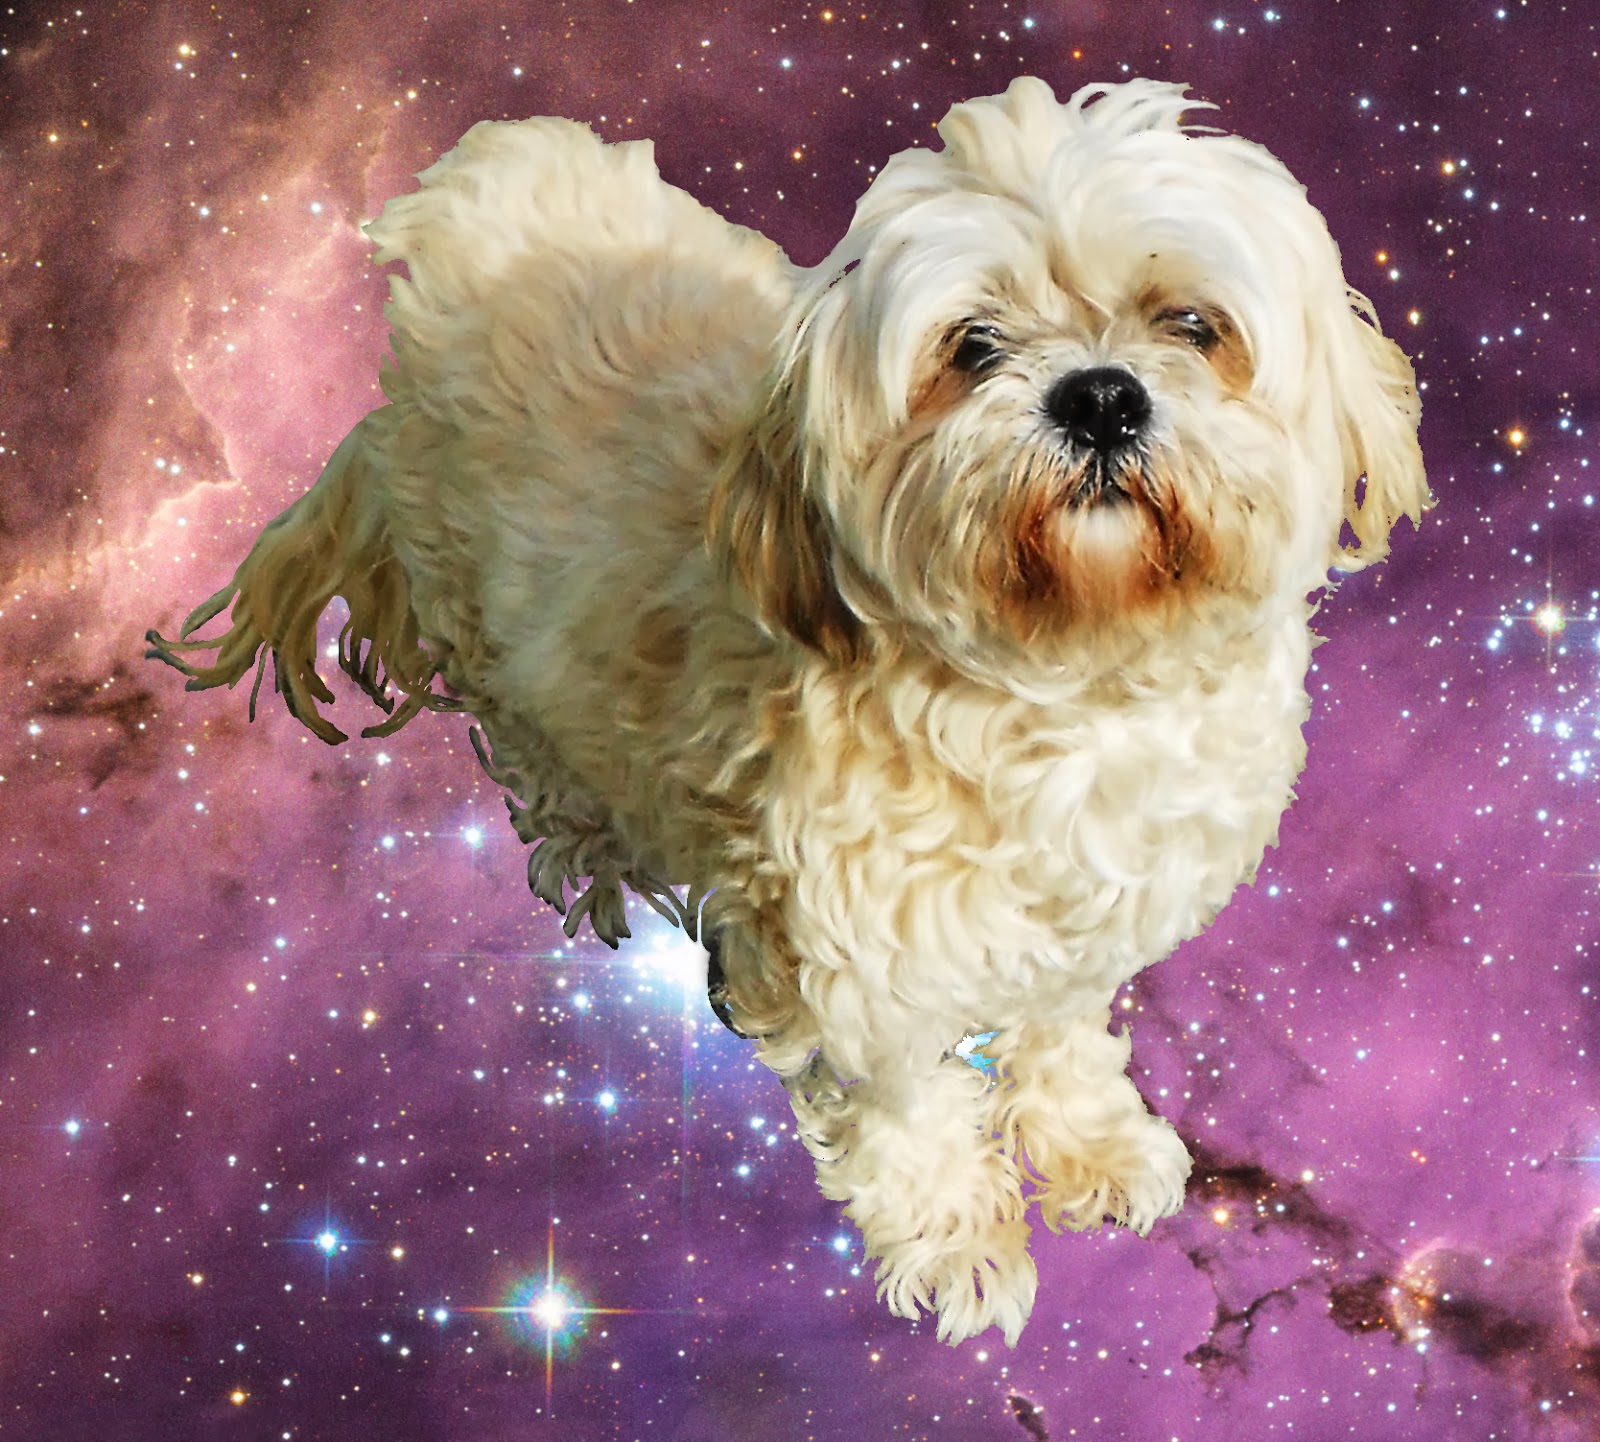
Minnie with background replaced with a space scene.
Minnie in space. Photo by NASA, ESA. Acknowledgement: Josh Lake.


Monday, January 27, 2014

You Must Be Patient With True Detective and Branding Ideas

I haven't been very good at updating this whole blog thing as of late. With all the great TV shows on-air... True Detective has got to be the most interesting snooze on-air right now, and with Shameless back, well my Sunday nights are booked.

For the past several weeks, I have been working on marketing myself, coding my own website in CSS3 and HTML5. But I have been having some trouble branding myself. What do you think a good name for my business should be? I have it narrowed down to anything with my initials really. Here is a logo I built:

Logo with transparent initials.


The logo is transparent through the initials to show off anything in the background. Here is an example of the logo with a background image:

Kind of like the bat signal?
The good news is I finished my course at ed2go.com on Introduction to CSS3 and HTML5. I am looking forward to my next course, Intermediate CSS3 and HTML5 starting in mid-February.

As for my branding, I am having trouble coming up with a name. Here are some quick mockups I created in GIMP's logo creation feature. I have tried "gabriel ohh designs:"

Alien glow example.

Here is "g-ohh designs:"

Glowing hot example.
Here is "gohh designs:"

Neon example.
I am not really sold on either, just trying to throw ideas out until I find something that sticks.

Back to True Detective, the story moves at a snail's pace. Back when I was in Film Studies, I learned to call a slow movie, "patient." Well you have to be patient with True Detective. The next time I dress up for an interview, or court appearance, I am taking a cue from Rust's wardrobe. Gotta love the sleazy style, makes you want to read Nietzsche and Camus again. Also, the opening credits to the show have got to be the best I have seen on television. Check them out:


Sunday, December 15, 2013

Broke My Debian System

So it appears my Debian "Wheezy" desktop is broken. Came home last night and my gf attempted to look at FB using the desktop. She mentioned it was being very slow and the Seamonkey browser kept crashing. So I rebooted thinking: flush the memory, things will return to normal. Nope.

Upon rebooting, I noticed a warning message indicating:

root file system has insufficient space

OK. That is a new one. I proceed to finish the boot process and expect Debian to load but nothing happened. So I rebooted into Debian Safe-Mode (which allows for command line maintenance) and entered the df command (disk free). df showed my main partition where all my files are stored is 100% full. Not sure how that happened since I have not downloaded any huge files. I entered du (disk usage) and found my home directory was 29 Gb. (The hard disk is only 37 Gb). Various other directories had 1-4 Gb of data. Very strange because my install of Debian is relatively fresh with a reformatted disk.

So I concluded that I needed to delete some files and the best way to do that would be to load a live CD and poke around the bloated partition. I inserted Precise Puppy (Puppy Linux) into the CD-rom drive and rebooted. Puppy loaded OK but I immediately noticed that only one of the two hard disk partitions were mounted. Upon scanning my hard disk with Gparted, I realized the volume that I need to access uses LUKS full encryption and I cannot mount it to delete some files. Bad news.

Here things got worse. I turned to the Internet for some help. I found a discussion about mounting encrypted volumes from command line at Ask Ubuntu. I found some information that looked promising and entered the following command:

cryptsetup luksOpen /dev/sdb5 sde5_crypt

The result of which gave me:

device-mapper: reload ioctl failed: No such file or directory

Great!  I don't know what that means.

I did find a very good short blog post on this subject by Alvin Abad,
How to Recover a LUKS Encrypted Disk, but I still end up with the device-mapper ioctl failed error. 

Unfortunately, the PC hardware has got to be around 10 years old and various components are failing (power supply, audio card) so I think it is about time to build a new PC. Too bad because I still  have a lot of work to do tonight.


Saturday, December 7, 2013

Uploaded My 1st Website

It took about 4-5 weeks but I finally uploaded my first website! I was much more excited when I was able to connect to the webhost server via FTP and finally upload my files. I had trouble with connecting to 000webhost via the file manager (to upload via the web) and FTP. Late last night I was able to connect with FileZilla and transferred all my website's files. I did put in a trouble ticket with 000webhost and received some feedback but wasn't much help.
My first website - Coding HTML with Free Text Editors for Linux

My website is about Coding HTML with Text Editors for Linux. Go to http://texteditorsforlinux.uphero.com to check it out. It took me awhile to put together the research (I actually used all mentioned editors to put together the site). I wrote about GUI-based editors Geany, gedit, Leafpad, and TEA. I plan to add some WYSIWYG editors such as Kompozer, Seamonkey, and command-line editors such as Vi and Vim later. Anyways, I hope it can be of use to others coding HTML on a Linux-based system.

My current Twitter profile background image
In other news, I am planning a few more websites as well as enrolling in another course (Introduction to CSS3 and HTML5) at ed2go.com. For those interested in learning some new skills online (not-for-credit classes), I would highly recommend ed2go. So far my experience with them has been very good.

The next sites I am planning include a site about Twitter backgrounds. I plan to create a series of generic-themed backgrounds for people to download and use on their own Twitter profiles and possible draw some attention to myself as a graphic designer, maybe make a few duckets here and there ;)

Tuesday, November 19, 2013

General Update, New Projects

Have been super busy as of late with the holidays quickly approaching, class, and going to many work engagements. In other words, it has been difficult to update this blog. There has been much to write about in the tech world but I just have to leave it alone. On the one hand, I have been learning HTLM and will be taking another class starting December 11th. If anybody is interested, check out the catalog at ed2go for online classes on web development and associated topics such as Java and JavaScript. 

My latest project.


Currently I am working on building two websites, very amateurish but I promise to publish for all. One site will focus on text editors for Linux (I know, sounds entertaining). Another is influenced by the song The Gambler, by Kenny Rogers (now that will be entertaining). Check back soon for new writings on new tech happenings or random shit because they are happening all the time.


Saturday, November 2, 2013

Mask an Image with The GIMP

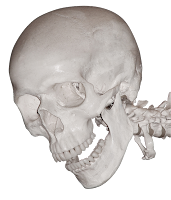
Original image.
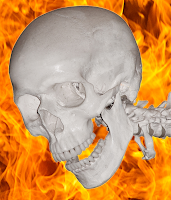
Image with different background.


This past Halloween, I started working on a quick tutorial on masking images. Well it got complicated and I stopped. Well I am finally getting around to finishing this tut.

You can do a lot of cool things with masks such as replacing the background with a different image or making the background transparent to save as a portable network graphics (PNG) file.

1.) Load your image in The GIMP. I grabbed the skull from SXC.hu, a great place to look for free stock photos. Be sure to read the standard restrictions before downloading and using an image from SXC.hu. Note: Try to grab a photo with a simple background color. For this tutorial, I will be using the Select By Color tool to select the image. You may also use the Free Select Lasso tool or the Scissors Select tool (aka Intelligent Scissors) if Select By Color does not work for you.

2.) Go to the Layers dialogue and right-click your image and select Add Layer Mask. In the Add Layer Mask dialogue box, just select White (full opacity). You will see a white box appear next to your image.
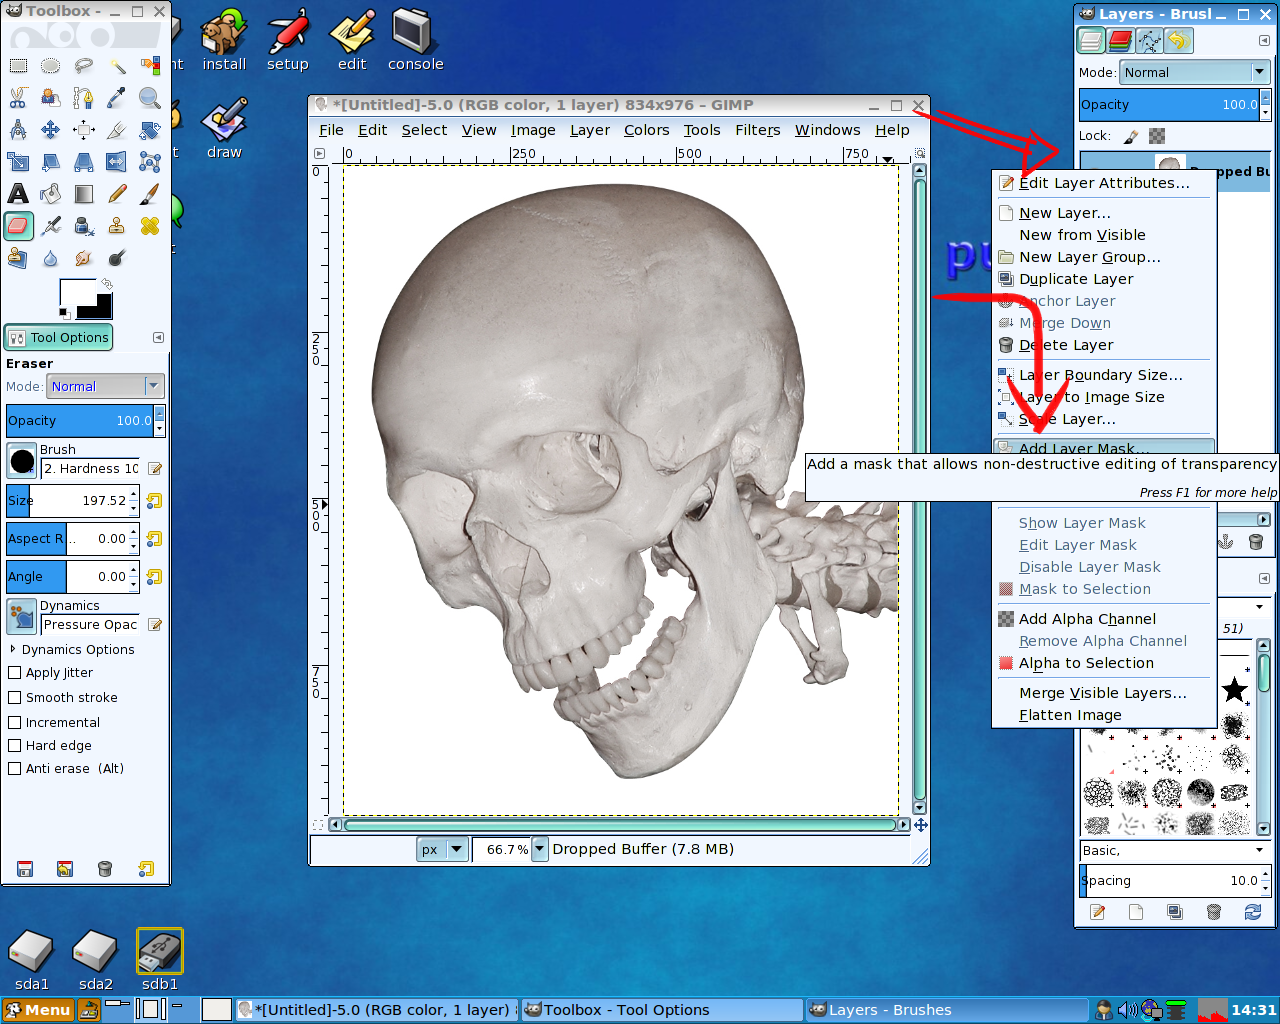
Add Layer Mask

3.) Now you are going to select the image. See the black box around your image in the Layers dialogue? That means that image is inactive. We need to make it active. To do this, you need to select the image using the mouse. You should see the black box move over to the white mask.
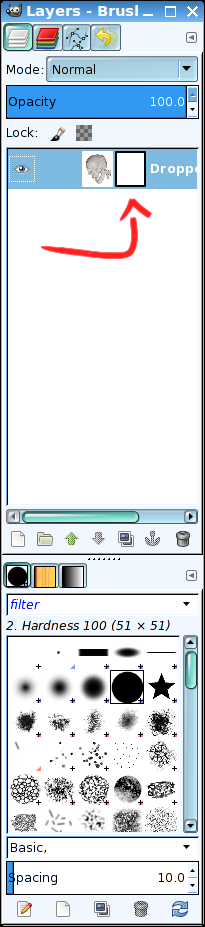

Select the image. Move the black box over to the white mask.

4.) If your image has a solid background, use the Select By Color tool from the Toolbox to grab the background area of the image. If your background is more complex, you will want to use the Lasso tool to grab the area around your subject.

After using the Select By Color tool, you should see some squiggly/marching lines around the edge of your image (the background) and the part of the image you want to keep. This will select the image you want to keep and allow you to erase the background.

Note: If you used the Lasso tool, you will see the marching lines around your subject that you enclosed the Lasso around. After selecting the subject with the Lasso tool, go to Select, Invert. You need to invert your selection in order to remove the background with the layer mask. Once you invert, you will see the marching lines around your subject and the background, such as in the example below.
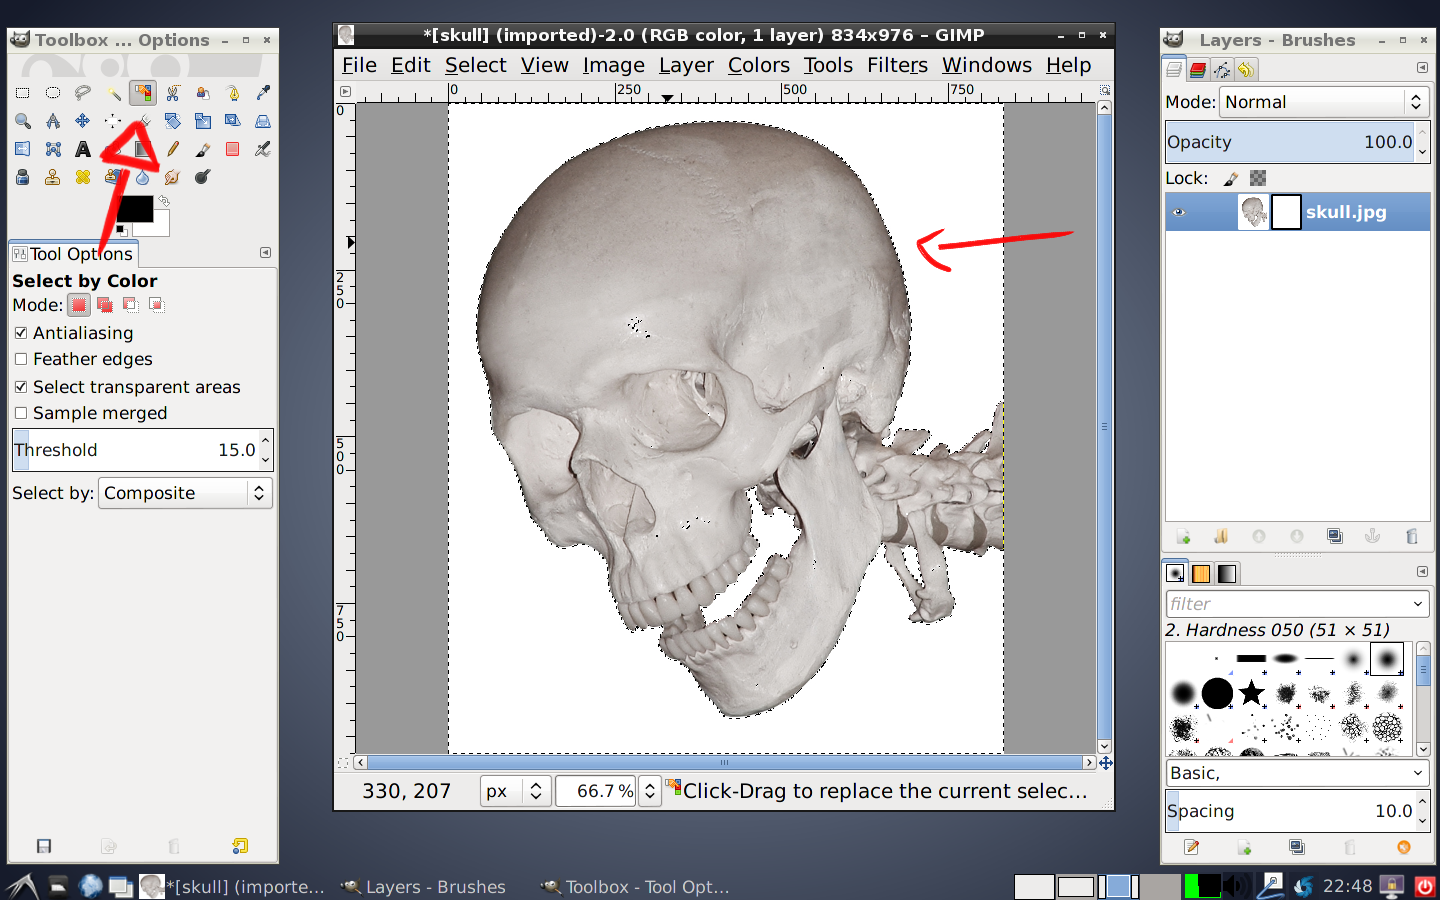

Marching lines around your subject and background.

5.) Now go back to your Layers dialogue and select the white mask (move the black box over to your image).
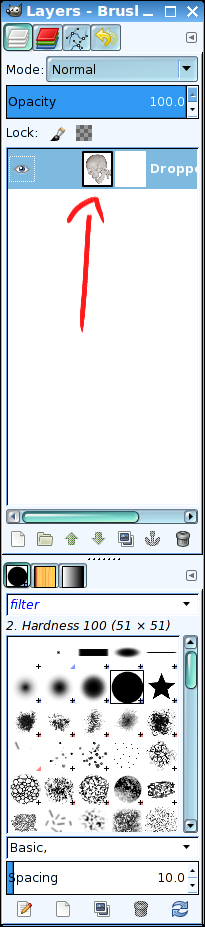
Select the mask. Move the black box over your subject.
6.) Before you remove the background, you need to make sure your foreground and background colors are white and black, respectfully.  Go to the Toolbox and make your foreground white and your background black.

Foreground is white. Background is black.

7.) Select the Eraser tool and an appropriate brush. Proceed to remove the background. With the layer mask selected, and your foreground color white, the eraser will remove the background and leave the image you want to keep. Proceed to remove the background.
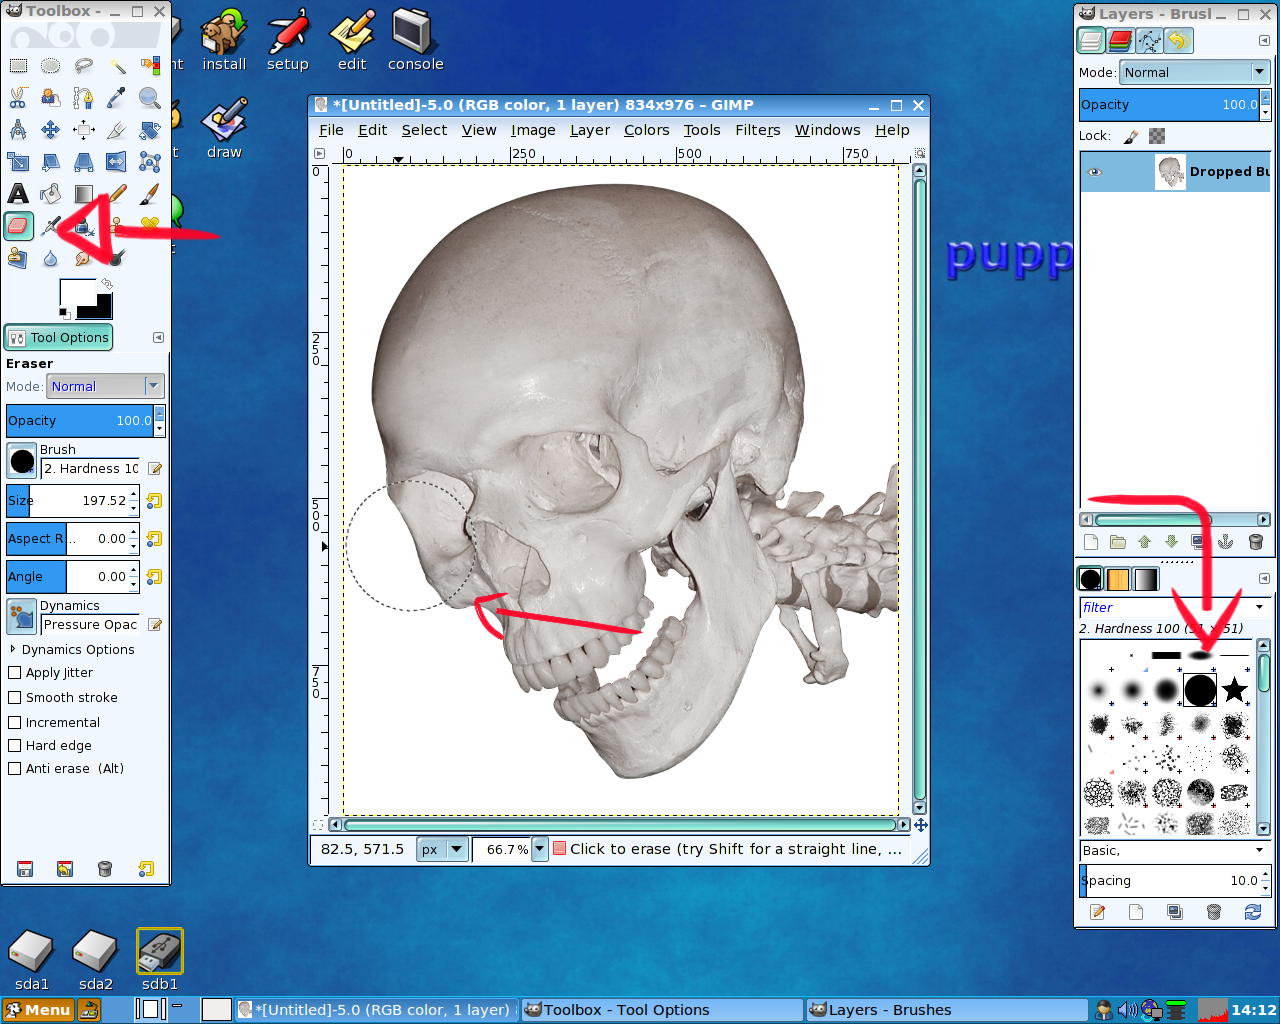

Use the eraser to remove the background. Make sure your Layer Mask is selected. Note, in this image, the Layer Mask is missing in the Layers dialogue.

8.) You will see the layer mask in the Layers dialogue change. The white is visible but the black is not. This is an example of a layer mask. Now you can un-select everything (Ctrl+Shift+A or Select, None). Save the file as an PNG or replace the background with something else.
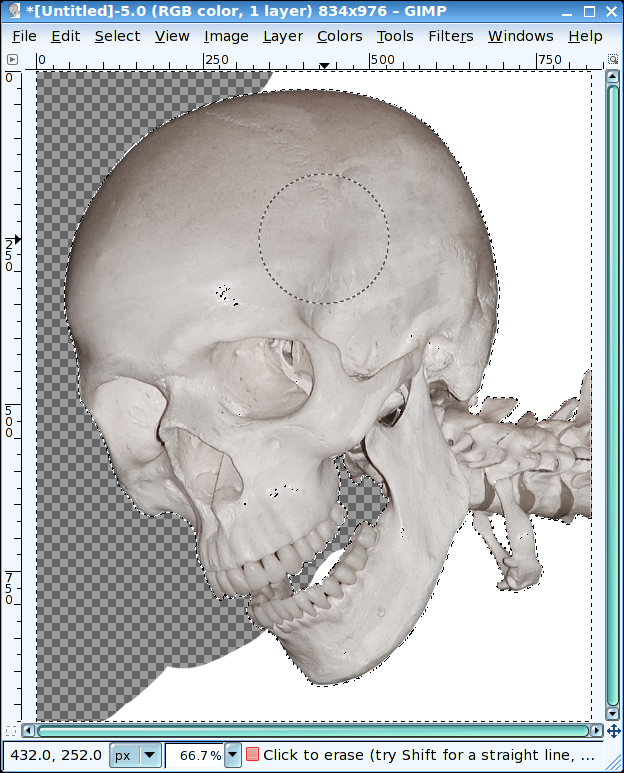

Using the eraser to remove the background.

9.) I went to SXC.hu and downloaded a stock image of some flames. To create the background, first add a new transparent layer. You can do this from the Layers dialogue or select Layer, New Layer. The default values are OK in the New Layer dialogue. Select OK.

10.) Drag the new layer below the masked image in the Layers dialogue. Select the new layer. Select File, Open As Layers and add your background image.

11.) Now you have the image and the background, you may see some areas that you need to retouch.
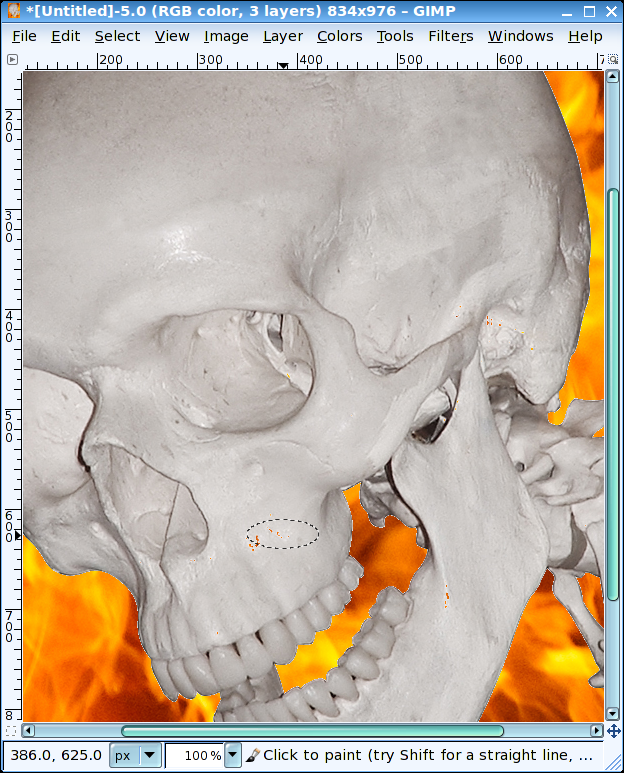
Some areas that need to be retouched.
12.) Use the eyes in the Layers dialogue to hide the background. Make sure you have the Layer Mask selected (the white border around the layer mask in the Layers dialogue). By doing this, you can bring back the background we erased earlier without touching the image.
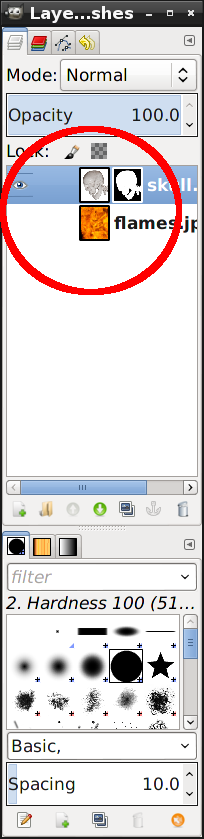

Hide the background. Select the Layer Mask.

13.) After retouching, you can reveal the background. You may want to add a Guassian Blur to the mask to blend the image with the background.

Adding Guassian Blur to the Layer Mask.

14.)  Here is the end result of this project. Hope you had fun. If you have questions, feel free to reach out.