Tuesday, November 19, 2013

General Update, New Projects

Have been super busy as of late with the holidays quickly approaching, class, and going to many work engagements. In other words, it has been difficult to update this blog. There has been much to write about in the tech world but I just have to leave it alone. On the one hand, I have been learning HTLM and will be taking another class starting December 11th. If anybody is interested, check out the catalog at ed2go for online classes on web development and associated topics such as Java and JavaScript. 

My latest project.


Currently I am working on building two websites, very amateurish but I promise to publish for all. One site will focus on text editors for Linux (I know, sounds entertaining). Another is influenced by the song The Gambler, by Kenny Rogers (now that will be entertaining). Check back soon for new writings on new tech happenings or random shit because they are happening all the time.


Saturday, November 2, 2013

Mask an Image with The GIMP

Original image.
Image with different background.


This past Halloween, I started working on a quick tutorial on masking images. Well it got complicated and I stopped. Well I am finally getting around to finishing this tut.

You can do a lot of cool things with masks such as replacing the background with a different image or making the background transparent to save as a portable network graphics (PNG) file.

1.) Load your image in The GIMP. I grabbed the skull from SXC.hu, a great place to look for free stock photos. Be sure to read the standard restrictions before downloading and using an image from SXC.hu. Note: Try to grab a photo with a simple background color. For this tutorial, I will be using the Select By Color tool to select the image. You may also use the Free Select Lasso tool or the Scissors Select tool (aka Intelligent Scissors) if Select By Color does not work for you.

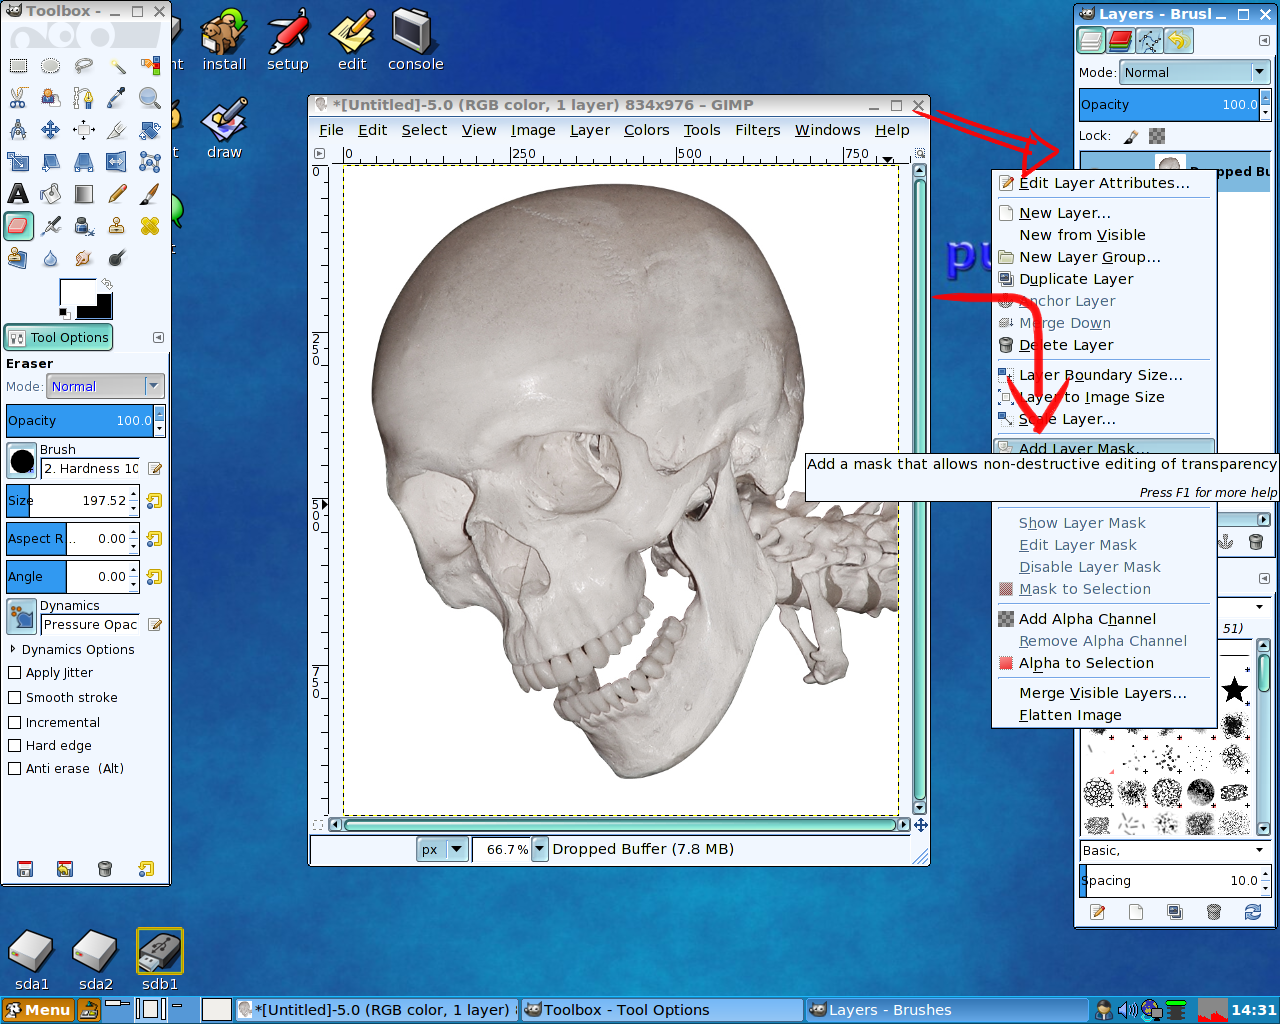
2.) Go to the Layers dialogue and right-click your image and select Add Layer Mask. In the Add Layer Mask dialogue box, just select White (full opacity). You will see a white box appear next to your image.

Add Layer Mask

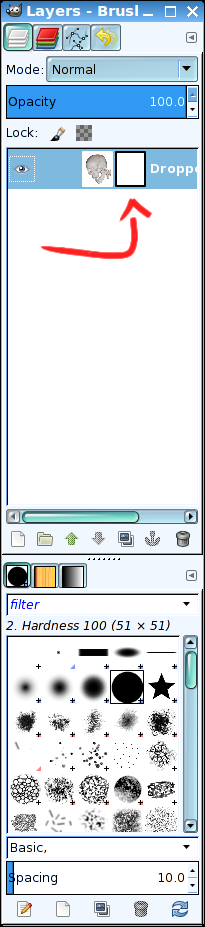
3.) Now you are going to select the image. See the black box around your image in the Layers dialogue? That means that image is inactive. We need to make it active. To do this, you need to select the image using the mouse. You should see the black box move over to the white mask.


Select the image. Move the black box over to the white mask.

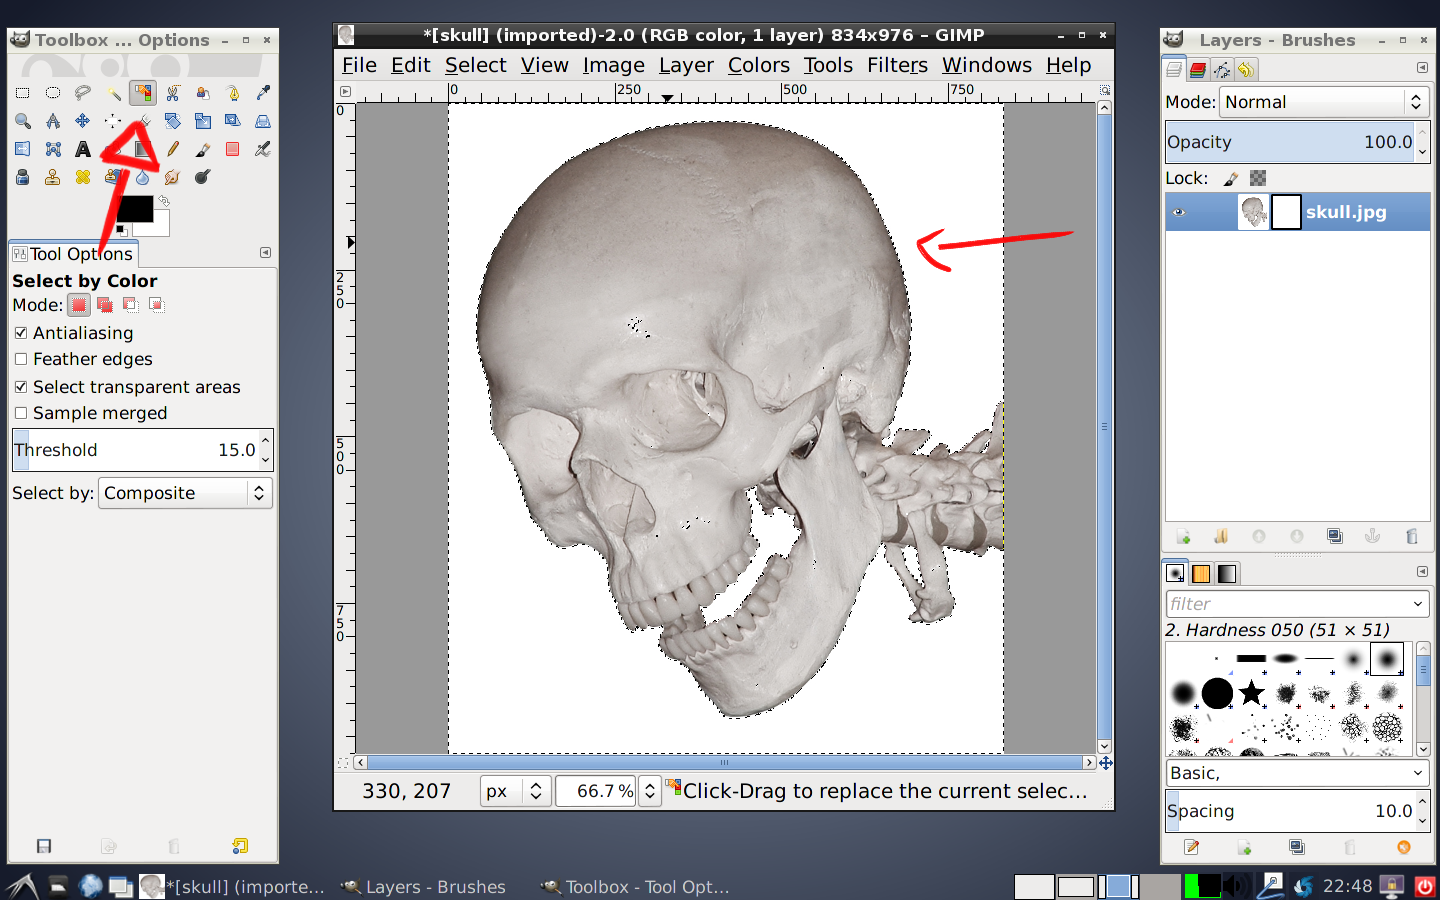
4.) If your image has a solid background, use the Select By Color tool from the Toolbox to grab the background area of the image. If your background is more complex, you will want to use the Lasso tool to grab the area around your subject.

After using the Select By Color tool, you should see some squiggly/marching lines around the edge of your image (the background) and the part of the image you want to keep. This will select the image you want to keep and allow you to erase the background.

Note: If you used the Lasso tool, you will see the marching lines around your subject that you enclosed the Lasso around. After selecting the subject with the Lasso tool, go to Select, Invert. You need to invert your selection in order to remove the background with the layer mask. Once you invert, you will see the marching lines around your subject and the background, such as in the example below.


Marching lines around your subject and background.

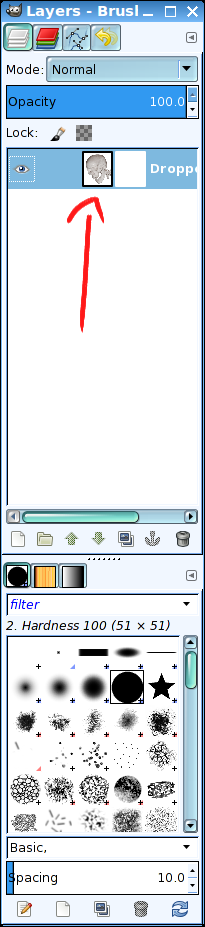
5.) Now go back to your Layers dialogue and select the white mask (move the black box over to your image).

Select the mask. Move the black box over your subject.
6.) Before you remove the background, you need to make sure your foreground and background colors are white and black, respectfully.  Go to the Toolbox and make your foreground white and your background black.

Foreground is white. Background is black.

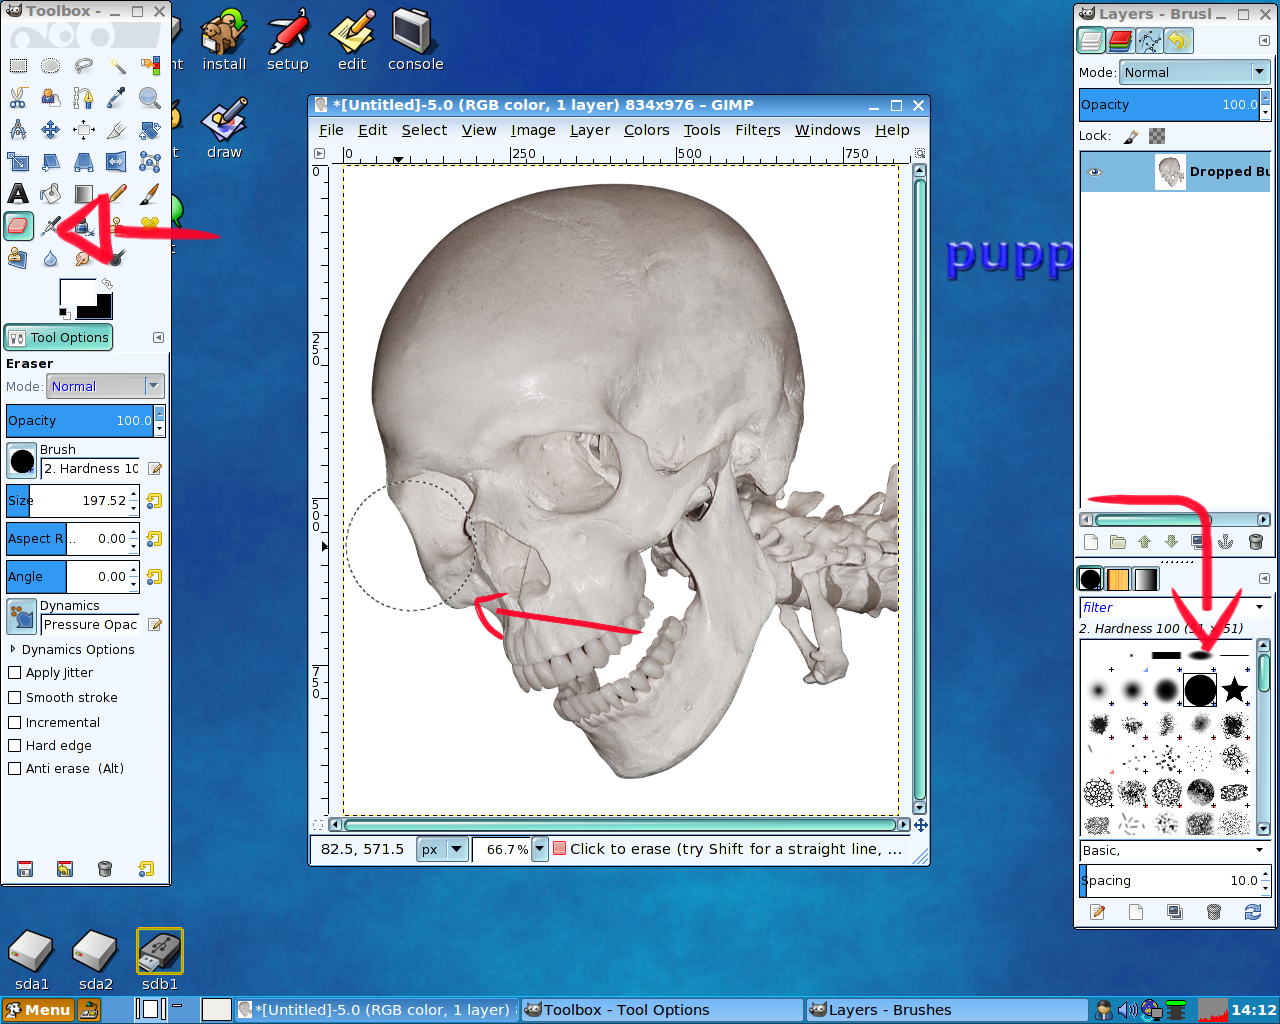
7.) Select the Eraser tool and an appropriate brush. Proceed to remove the background. With the layer mask selected, and your foreground color white, the eraser will remove the background and leave the image you want to keep. Proceed to remove the background.


Use the eraser to remove the background. Make sure your Layer Mask is selected. Note, in this image, the Layer Mask is missing in the Layers dialogue.

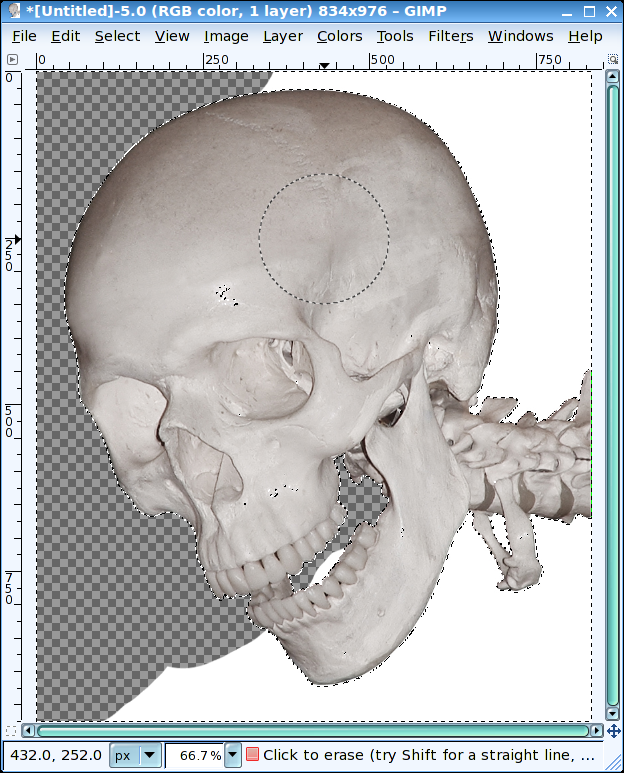
8.) You will see the layer mask in the Layers dialogue change. The white is visible but the black is not. This is an example of a layer mask. Now you can un-select everything (Ctrl+Shift+A or Select, None). Save the file as an PNG or replace the background with something else.


Using the eraser to remove the background.

9.) I went to SXC.hu and downloaded a stock image of some flames. To create the background, first add a new transparent layer. You can do this from the Layers dialogue or select Layer, New Layer. The default values are OK in the New Layer dialogue. Select OK.

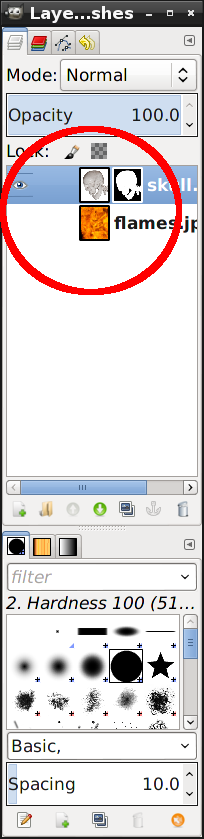
10.) Drag the new layer below the masked image in the Layers dialogue. Select the new layer. Select File, Open As Layers and add your background image.

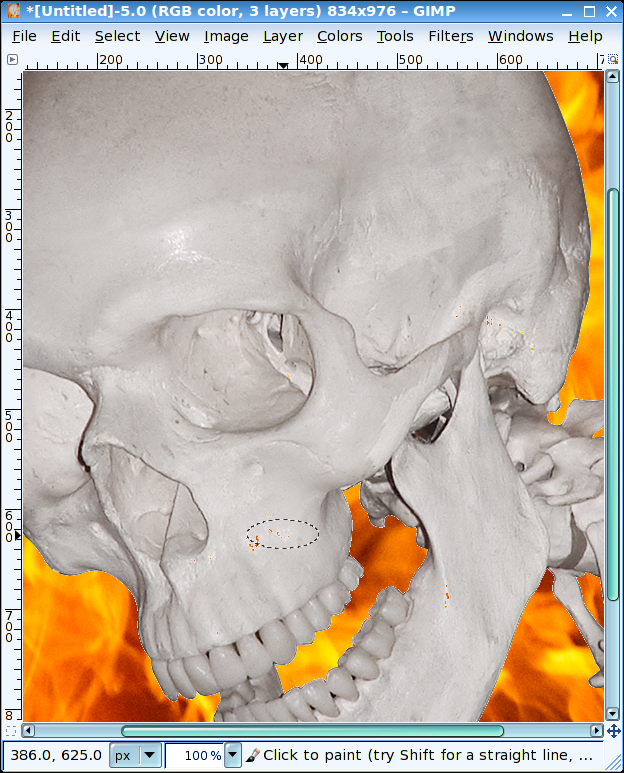
11.) Now you have the image and the background, you may see some areas that you need to retouch.

Some areas that need to be retouched.
12.) Use the eyes in the Layers dialogue to hide the background. Make sure you have the Layer Mask selected (the white border around the layer mask in the Layers dialogue). By doing this, you can bring back the background we erased earlier without touching the image.


Hide the background. Select the Layer Mask.

13.) After retouching, you can reveal the background. You may want to add a Guassian Blur to the mask to blend the image with the background.

Adding Guassian Blur to the Layer Mask.

14.)  Here is the end result of this project. Hope you had fun. If you have questions, feel free to reach out.


Monday, October 28, 2013

Comcast Internet Plus: Psst! Hey buddy, what a cheap deal on a bundle?

In what appears as a move benefiting the consumer, last week it was reported here and here that Comcast is testing a package deal offering Limited Basic TV, HBO, and high-speed Internet access.

According to DSL Reports, the package is known as Internet Plus and includes local broadcast channels, video-on-demand, HBO, HBO Go, and 25 Mbps broadband Internet service. The deal also includes, StreamPix, a streaming video service being offered by Comcast. The trial is not available in all markets.

To those looking to shave a full dollars off the monthly bills and still have access to high quality entertainment and Internet access, this seems like a sweet deal.

Figures from DSL Reports.
However, Comcast plans to sign-up subscribers with a promotional low price. Within two years, the subscriber would pay $80 per month for Internet Plus. DSL Reports notes that the package trial begins with a promotional price of $40 to $50 monthly for one year. After that Comcast plans to charge $60-$70 for six months, then the price jumps to $70-$80 dollars per month. That is no longer a sweet deal.

Local News over-the-air TV.
For $80 per month, consumers can get a better deal from the satellite providers. (Although this does not include broadband Internet). Consumers can also get a better deal from Comcast itself with their Digital Starter and Performance Internet (20 Mbps) package.

For those looking to really save money, I would suggest purchasing a digital antenna for over-the-air HDTV reception and pick up the local channels. Then subscribe to the most basic broadband Internet service you can find. Currently, at home I am subscribing to Comcast Economy Plus (3 Mbps) for $39.99/month. I can verify that 3 Mbps is adequate for Netflix and streaming HD video.

Internet Plus looks more like an attempt to recruit some cord-cutters with a low entry fee. Like a media crack dealer, first one is always free (or cheap). When subscribers get hit with higher costs down the road combined with the wide variety of options (Chromecast, Apple TV, Roku) they may swear off cable for good.

Saturday, October 26, 2013

Rdio Free On Mobile, Last.fm Scrobble, Pandora Workaround

Ever since my Last.fm radio stopped working in my Chromium and Seamonkey browsers, it's been a long time since I have tuned into any online personalized music streaming service. I haven't bothered to figure out the problem. Mainly because I have been busy and also I don't like to listen to music through my browser. Before that, I had a lot of fun streaming Last.fm from my Rhythmbox desktop media player, but then the API was killed by Last.fm. This affected not only desktop clients but the Last.fm Android and iOS applications. Matthew Hawn of Last.fm announced in a blog post:
On February 15 [2011], the radio service built into Last.fm mobile apps and on home entertainment devices will become an ad-free, subscriber-only feature.
Subscribing to Last.fm is cheap, $3.00 a month, and it is very tempting. But I am cheap to.
My Last.fm Profile shown in Rhythmbox.

I preferred Last.fm to other online music services because the recommendation engine is so much more personal. This degree of personalization is primarily due to the effect of scrobbling your own music collection. Last.fm uses scrobbling to maintain user listening data. Everytime a listener listens to music on a Last.fm-enabled player such as Rhythmbox or Banshee, the tracks get sent to Last.fm where the user's profile is updated. This helps build the Last.fm recommendation engine. My personal music collection weighs in at about 20GB. Very modest I know but it is mine, consisting of just about every CD I have purchased since I was maybe 12 years old. No pirating.

Connect your Facebook, Twitter, Last.fm with Rdio.
During the time of free streaming from Last.fm for players such as Banshee, Rhythmbox, one could also scrobble music from Rdio.com. For the streaming radio listener, this was great because it added an additional music engine to diversify your Last.fm profile. Also, when Rdio first started, it was free to stream from the browser for a few days a month. However, like all good things, Rdio ended the free service. Rdio now charges $9.99 for mobile and desktop streaming, $4.99 for desktop browser streaming. This is hard for me to justify since we still have Pandora.com, which is a freemium service (with ads). Also, for mobile, not only does one pay for Rdio streaming, but for their data plans as well.

Pithos desktop Pandora client, ad-free.
Luckily for the listeners, Pithos, a native Pandora Radio client for the GNOME Desktop is still able to stream music from Pandora.com, ad-free. Like the good old days when we streamed our Last.fm accounts through our desktop clients. However, Pandora does not support scrobbling so the recommendation engine is just not as good.

Today, I checked my email and there was a note from Rdio telling me: Stations, now free on mobile. Tune in.

Rdio knows me. They beckon to come back and listen-without paying a thing. In fact, Rdio has been offering this service to former subscribers since October 3rd, 2013. Some speculate that since partnering with Cumulus Media, an owner of 525 radio stations, that Rdio would be switching to ad-supported freemium model. Well that sounds great, I can add Rdio to my iHeartRadio app on my Nexus 4 phone. However it would still be nice to get the same free listening on my desktop again  but those days are pretty much gone.